Tying the �
By: Clark Reid
This pattern was developed at a time when no other commercial Cicada imitation was available. I had seen several other Cicadas� developed by Masterton tier Wayne Harter and Taupo�s Bronwyn Wilson, and while effective, I didn�t believe they carried the triggers to be really successful on very wary trout. Both were fine fast water patterns but �lacked something� on slower water.
Being a big believer in the �supernormal releaser� theory on trout triggers (Bob Wyatt recently did an excellent article on this in Flylife Magazine) I set about trying to identify the main triggers a cicada would present a hungry, though wary trout.
Body shape was obviously the first stand out feature. Secondly, but just as important was the way a Cicada�s wings glistened in the sunlight, almost to an iridescent degree. Thirdly the large compound eyes dominated the entire profile.
I was at
Bronwyn Wilson�s pattern became the main basis but my pattern included these additional materials and, hopefully, the triggers.
That this has now become
Pattern:
Hook: Tiemco 2312 or TMC 200R
Size: 4-12
Thread:
Body: Deer Hair (Antelope is better if you can get it). Best deer hair is Whitetail Belly hair. Color to suit. Standard is Olive variants can include brown, Grey, Green and Tan or a mixture of all.
Under-wing: Accent Flash or Midge Flash
Over Wing: Web Wing or Florist ribbon cut to shape
Eyes: Mono-filament Eyes.
Collar: As for body
Head: As for body.
Tying sequence:
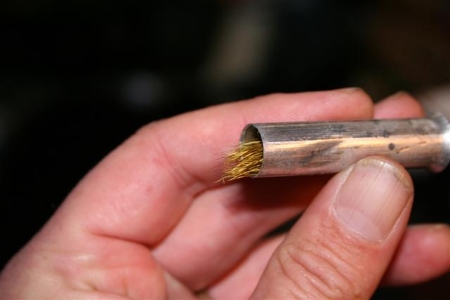
When tying Deer Hair flies one of the most useful tools you can have is a fine toothed comb. You can buy a specialty product such as this�

Or get a �Nit comb� from the chemist. This is used to remove the fine under fur from the deer hair and makes spinning and flaring much easier.
Mount the hook in the vice and attach your thread. Cut a small clump of deer hair� not too much, about this size is perfect for the first spin�

Then cut it so you have a small clump. This will help the deer hair spin past the hook and makes trimming easier later�

Pinch the Deer hair onto the hook. Hold it so you have a good firm pinch of both the deer hair and the hook. Take your thread Up and over the deer hair while still pinching so it is not yet tight but does totally encompass the deer hair


Pull with a steady pressure and the hair will start to flare and spin. Take several more wraps to secure it.

Now the bit I can�t photograph as I only have two hands�..
Pinch the thumb and forefinger of your left hand at the back of the hook and the thumb and forefinger of your right hand in front the deer hair you have just spun. Push both toward each other as hard as you possibly can. Repeat these steps of spinning and then pushing until you have built up enough for the body.

Using a rotary vice makes this process much easier as you can spin the fly around at any time to check you have got uniform coverage. Without that you have to be careful you don�t have bald spots on the back unseen part of the fly.

Tie the thread off and remove the fly from the vice. You now trim the body to shape. I always make the first cut on the underside and just lop everything off as flat to the hook shank to ensure adequate gape is left on the hook for hooking purposes.


Now put the fly back into the vice and reattach the thread.
Note I have cut a low sort of �ramp� on the very top of the fly. This will allow the under-wing and wing to lie flat like the natural.
Get out some accent flash, or in this case �midge Flash� (Just smaller diameter Accent Flash)

Cut to length and tie in on top.

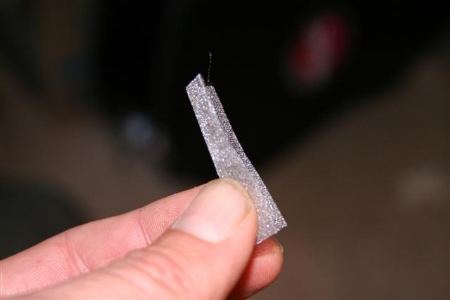
Next use either Web-wing (On left) or florists ribbon to cut the wings to shape.

I cut a square about this size and fold it in half.
 I
I
I then round off one end to this shape�

Then cut down the fold and you�ll have two identical wings�

Then lay them on top of one another and separate them as you would if holding playing cards in a tight poker matchJ.

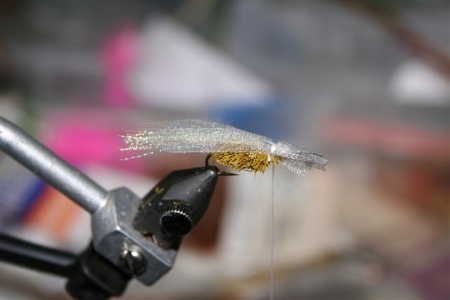
These then get tied in on top of the midge flash. Use the same pinch technique with the thread we used earlier for our spinning of the deer hair ensuring the wings tie in flat.

Next you are going to need a hair stacker to do the collar correctly.

Simple tool which is invaluable.
Cut a piece of deer hair with the tips left in place� about this size�.

Insert tips first into the stacker and tap several times hard on a hard surface. This will ensure all of the tips are aligned for a good neat finish.

Once done carefully remove the top section of the stacker and aligned tips should protrude like so�
Carefully remove them and tie in top, again using the pinch method, to form a neat collar. Try to get them in a full semi-circle over the top of the fly.

This photo is not the best example, I prefer them to come right down and almost act as outriggers to each side of the fly.
Trim the butts off and start to spin the deer hair for the head.
Keep spinning until you have covered all areas of the head. Once done tie off at the front, cement the finish and now comes the trim of the head.
The most important thing to be careful of is not to also trim the collar fibers away. TAKE YOUR TIME or you will regret it.

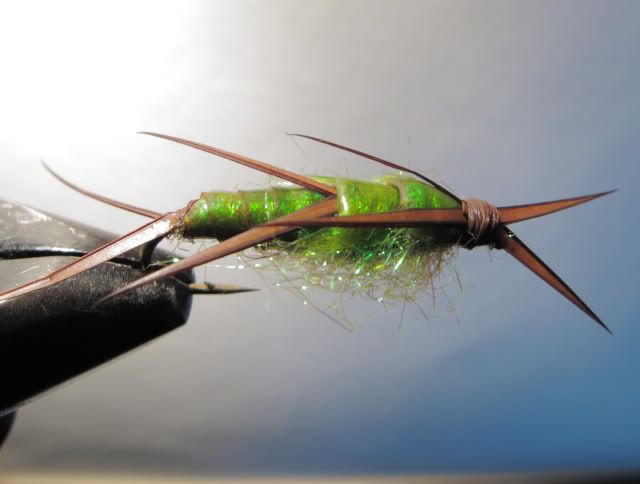
You should now have ended up with a completed �

All photos text and images � Clark Reid 2006.

Another fantastic fly Clark! 4 mins you say? heck it would take me longer than that!!!!! I'm afraid I get so engrossed with it all I tend to lose all track of time. so I don't know how long really it would take me each fly. 
I agree this fly is an awesome killer. Thanks again Clark.....
Jeanne

Change in seasons, change in tactics Not a lot to report in the ‘big fish’... Read More >
Fish galore! Coming off the back of Easter Weekend and with some very nice weather... Read More >
Excellent snapper action There is some excellent autumn snapper fishing straight out and up the... Read More >
Whangarei Harbour fishing well Like the weather, the fishing has been patchy throughout Bream Bay... Read More >


Major Bites
Minor Bites
Major Bites
Minor Bites
 Forum Topics
 New Posts
 Search
 FAQ
FAQ Register
 Login
Login


 Topic Options
 Post Options
") Likes(0)
Likes(0)