
The next big thing
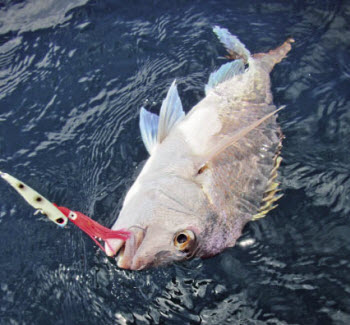 Fishing is such a learning curve for me, constantly changing as I discover new techniques and products.
Four years ago, pretty much all my fishing was based around soft-baiting, and thinking there was no way anything else could be more effective, I honestly believed I’d be soft-baiting well into the future.
Oh how wrong I was! Now I rarely put soft-baits on, because I’m inchiku jigging for snapper 90% of the time in depths ranging from 10m to 70m and this technique often works better than soft-baiting.
I did not see this coming, and can only wonder if any more surprises like this might be in store. After all, the fishing lure market is always on the move, and lures are getting better and better. Poor fish, eh!
Rods and Reels
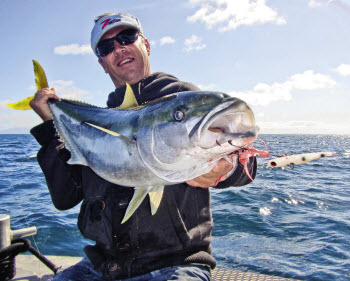 My last article on inchikus was, to my surprise, about two years ago. My thoughts, equipment and the techniques have evolved hugely since then, so it’s time to share this latest information.
For a start, the rods I use have changed a great deal. I’ve moved away from short, parabolic rods to longer, lighter specialist rods designed specifically for inchiku jigging. The tip is very soft and bendy – an aspect I did not fully appreciate about inchiku rods at first. Now I do. The tip needs to be supple to slow the movement of the lure down, as well as to act as a shock absorber, decreasing the chances of the small hooks ripping out when playing a fish.
Inchiku rods designed for New Zealand snapper have an incredible amount of grunt. My two favourites would be the Shimano’s Bottom Ship rods and Ocean Angler Jitterbug rods. Both are similar and, as their names suggest, are suited for fishing Bottom Ship and Jitterbug lures respectively.
I’ve been an avid overhead outfit user for many, many years, always preferring overhead combos to spin – but I’ve changed in this regard, too. I don’t like saying it – it feels as if I’ve changed allegiances and am going against what I’ve preached for so long about the advantages of overhead set-ups – but now I’m using spinning rods for inchiku jigs, and am absolutely loving them.
These rods are unusual in their basic concept, being super lightweight and very parabolic in nature, and once again my two favourites are Shimano’s Bottom Ship spin rod and Ocean Anglers Powerflex spin 4-8kg.
So why do I now like fishing spin gear with inchiku-type lures? Well, they allow lures to get down quicker than a lightly thumbed overhead/baitcaster reel, and make winding them in much quicker too, due to their larger spool circumference. Also, having the reel underneath the rod reduces the amount of torque produced in the rod, and seems to enable a lot more power to be generated. Another cool thing is that I can use my 2500 soft-bait reel on the rod, resulting in a super-lightweight rig. Consequently, if I want to go for a soft-bait fish on the way home in the shallows, these spin outfits can do the job here as well. Being such a versatile setup, I’m finding myself only taking this outfit when I go fishing, instead of more specialised deep water and shallow water setups – and I can’t wait to get this little spin rod fully bent again!
As for the reel, I suggest buying a decent reel with a smooth drag to look after the smaller hooks used on inchiku lures. Even the strongest inchiku hooks can only stand a modest amount of pressure, so it’s in your best interest to preserve them as best you can. As far as overhead reels are concerned, I prefer to use either a Shimano Trinidad 10A or a Daiwa Pluton (which is my favourite).
I’m not quite sure what to say about favoured spinning reels, since I’ve only become a spin-tackle nut recently and am still realising their full potential. What I can say though, is that spinning reels are so much fun, and the noise they make when a fish is running out line is awesome. Again though, make sure you use a quality reel – your soft-bait reel will do – with sizes 2500 to 4000 being ideal for the role.
Braid and leader
These aspects play an important role with this style of fishing. The basic rule is the lighter the line you use, the more hooks-ups you’ll get. The balancing act therefore involves trying to ensure the line selected has enough strength to efficiently land the fish you’re likely to encounter. So for braid I use around 16lb/8kg; this will catch any size snapper as well as the odd modest-sized kingfish, and very rarely fails me. (When comparing braids, look at the product’s diameter rather than the breaking strain, as some manufactures’ stated breaking strains are very misleading. Besides, this indicates how much drag it will create in the water, and that’s important when slow-jigging.)
As for the trace, for inshore channel fishing I use either 15 or 20-pound (7-9kg) fluorocarbon trace, while out in the deep I use 20 or 30 pound (9-13kg). I never use anything more than this, as a heavy trace cuts down the bite rate hugely.
Worthwhile lure attributes
 (listed in most important to least important)
Colour; Size; Hook/cord quality; UV reflection; Glow; Octopus (skirt) quality.
Colour can be absolutely crucial to catching fish – something that became hugely apparent to me recently while skippering a charter. We were in the middle of a work-up and everyone was hauling in fish on the same type of lure – except one angler. So I checked his technique and even had a go with his rig myself to see what was wrong. All seemed okay, except snapper would not go near it. So I wound the line up and checked it over: it was a blue-silver Jitterbug, which is normally one of my favourites – and besides, we were in a work-up situation, and snapper hit anything here, right? Well, maybe wrong, so I changed over to orange, watched the angler drop down – and then hook up straight away! As I said, colour can be very important.
Therefore, ensure you have a good range of colours available, so you can swap them around until you find what’s working. Also, don’t keep on fishing with the same colour if you’re not getting any bites, and now that there are different-coloured octopus rigs available, making your own custom coloured combinations can be fun and productive.
Size can be critical, too. As a general rule of thumb, make sure your lure has enough weight to reach the bottom and stay near there for a good minute at least. For us, this generally equates to using 80-100g jigs when there is not too much wind around in waters around 30-45 metres deep. However, inchiku jigging has proven to be a good technique when used in the inner harbour and channels, too but provided you go down to 20g or 40g lure sizes.
Hook and cord: these components come down to quality and size. When I first started inchiku jigging I sourced my lures from Japan and started breaking hooks. This seemed an easy fix to me: I replaced them with regular 4/0 hooks. However, this proved to be a wrong move, as my dropsy rate increased. So I then spent a lot of time testing, and ended up dropping right back down in size to a 1/0 hook to get the problem sorted.
The cord also needs to be high quality; I believe the best is Dyneema cord. Make sure it’s limp and flexible so the rig’s octopus part moves freely (if the cord is stiff you’ll catch fewer fish). When selecting lures, check that the octopus rig is easy to change, as mucking around with tiny split-rings during a hot bite can be very frustrating.
UV reflection
This subject is quite big for me, because I believe a lure that reflects UV light catches more fish than one that does not (it’s proven that some fish use UV reflection to find and hunt their prey). Remember, UV reflection is not produced by glow paint, it’s a reflection of the strong, invisible rays from the sun – the same ones that give you sunburn. (The most common UV reflector is the zinc you put on your nose to protect your skin). Fishing is about putting the odds in your favour, so a lure with UV-reflective paint should increase your catch rate.
Glow paint
This paint actually emits light like a light bulb and glows down deep. Once again, I firmly believe it helps attract fish, so put the odds in your favour and use lures that glow.
Octopus skirts
 Having good quality is important in this instance, too. You want the lure’s ‘octopus’ to waft around down deep in the current, and the finer the octopus’ tentacles, the more action it will offer. Once again, this comes down to the quality: cheap octopus skirts will have relatively stiff strands, while good quality skirts have fine and flexible strands that produce more action and entice more fish.
The technique I use for inchiku jigging has slowed right down. I now find myself dropping to the bottom, then very slowly winding up five turns or so. Every few minutes I will wind to the surface and re-drop the lure. I would say 75% of my fish are caught during, or just after, my initial drop from the surface, just when the lure is touching down.
So if not catching, make sure you’re using enough weight to get down and slow everything down. Try to visualise your lure near the bottom with the octopus wafting around and lifting away from the lure to a horizontal position. This type of action seems to drive snapper frantic, and it’s how inchikus should be fished in my opinion. Moving them too fast turns them into a regular jig, preventing the octopus from lifting off the lure or wafting around.
When you get the technique right though, these lures possess an almost magical quality and will often out-fish any other type of bait or lure. No wonder inchiku jigging is fast becoming the next big thing! So get yourself some gear and give it a go – it’s heaps of fun and a very productive way to catch fish, whether you’re out deep or in shallower.
 |
This article is reproduced with express permission of
written by Paul Senior - 2013 Originally published in New Zealand Fishing News |
Fishing Reports Visit Reports
Manukau/West Coast Fishing Report - 15/10/26
Big spring snapper in 60 metres. The El Niño weather pattern isn’t going to be... Read More >
Rotorua Fishing Report - 15/10/26
Solid start to the season! The Rotorua lakes have all started the season well, and... Read More >
Tutukaka Fishing Report - 15/10/26
Big snapper in shallow. Things remain relatively quiet on the fishing front out of Tutukaka,... Read More >
Tauranga Fishing Report - 15/10/26
Bait and temperature on the rise. It’s been great to get out and see some... Read More >


Wednesday 21 October 2026
Major Bites
 - -
Minor Bites
 - -
Thursday 22 October 2026
Major Bites
- - Minor Bites
- -
Comments