
Gamefishing - rigging a skipbait
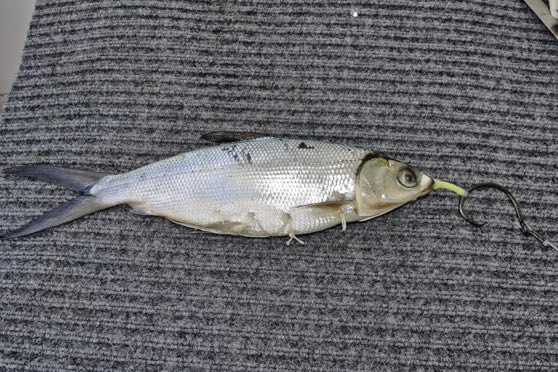
I'd hate to think how many billfish we’ve actually caught on this rig over the last 10 seasons or so. It can account for everything from giant black marlin on the Great Barrier Reef, blue marlin here and in the wider Pacific, plenty of striped marlin, and it’s even suited to deep dropping for swordfish.
 The rig can be adapted to a wide range of baitfish available in New Zealand waters, including mackerel, koheru, mullet, kahawai and trevally, right through to small Coke-bottle-sized tuna. It’s relatively simple and quick, and above all else, it works a treat.
Baiting up
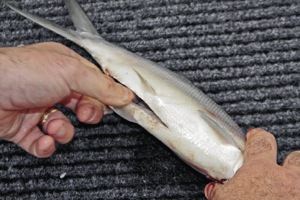
Prior to rigging any freshly caught bait, the guts and gills need to be removed while still leaving the throat-latch intact. Removing the guts and gills helps give the bait greater flexibility and reduces the rate of decomposition.
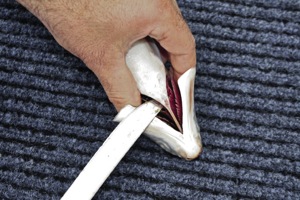 Adding a small amount of salt to the empty gill/gut cavity and skin hardens the bait up somewhat and reduces fishy odours. Considering some rigged dead baits can remain unfrozen throughout a day’s fishing, eliminating fishy odour can help maintain the crew’s enthusiasm to remain in the cockpit!
Start your rigging by taking approximately 1-1.5 metres of waxed thread. Dacron – usually 24kg on the smaller baits and 37kg on the bigger baits – works well if you’re unable to track down suitable waxed rigging thread. The 1 to 1.5-metre length mentioned will obviously vary slightly according to the size of the baitfish being used.
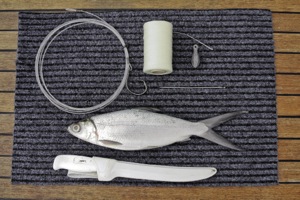
 The basic ‘Arenui’ skip bait rigging kit includes wax thread, bait needle, scissors, knife, a protector sleeve or chafe tube and a bait – in this case a milk fish.
Many anglers might consider a skip bait as being ‘old school’, but it is a useful weapon in any gamefisher’s armoury.
Fold the length in half so you have two equal lengths, and tie a clove hitch around the shank of your hook with the bended end. Follow this with an overhand knot with both strands to hold the clove hitch tightly in place.
.jpeg) Using a bait needle, thread the two tag-ends through a 3-4cm piece of tubing. We use flexible rubber protector tube that’s soft enough not to inhibit any action of the bait or hook, but still rigid enough to protect the thread against an aggressive bite or rasping bill. The main purpose of the tube is to keep the hook well clear of the bait during the hook-up process, giving it more chance to find its mark.
Using a bait needle, thread the two tag-ends through a 3-4cm piece of tubing. We use flexible rubber protector tube that’s soft enough not to inhibit any action of the bait or hook, but still rigid enough to protect the thread against an aggressive bite or rasping bill. The main purpose of the tube is to keep the hook well clear of the bait during the hook-up process, giving it more chance to find its mark.
Place the tubing hard up against the shank of the hook (tight against the previously tied overhand knot) and then tie another overhand knot in the two tag-ends to hold the tubing rigidly in place.
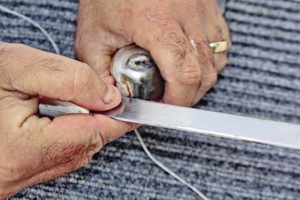
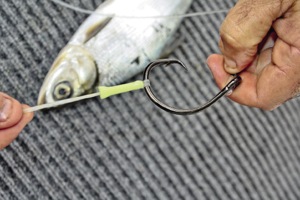 Start your bait rigging by cutting a small groove in the very tip of the fish’s lips. Be careful not to cut right through the jaw; just far enough to allow the overhand knot to sit nicely is the aim. Also, make sure it is dead centre, as this is the bait’s towing point.
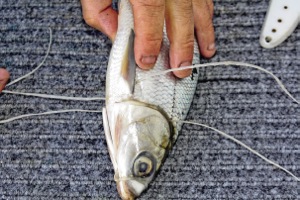
Now, using your bait needle, pass one tag-end down through the fish’s skull, usually three-quarters of the way back to the eye socket and as centred as possible. Pass the remaining tag-end up through the fish’s throat and out the same hole as the first in the opposite direction.
Now, tie the two tag-ends off firmly on the side of the fish’s head (it is important that the towing point doesn’t become loose, so make sure the knot is tight and firm).
 From here, take one tag-end with your bait needle and pass it directly through the front of the bait’s eye socket. Then, with the second tag-end and bait needle, pass it under the original stitching on top of the bait’s head (this stops the stitching tearing out of the hole created) and back through the eye socket opposite to the first tag end.
Once again, tie the two tag-ends off firmly with a couple of half-hitches under the bait’s jaw.
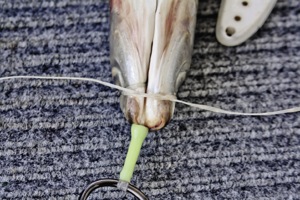
For the last step in rigging your bait, you need to pass each tag-end through the strong pectoral fin joints, again in opposite directions to each other, and then do a couple more half-hitches to finish off on the fish’s underside.
 A very important aspect of preparing dead baits is making sure they’re flexed before use. Stiff or rigid baits will spin and are unattractive to billfish, yet flexed baits skip, swim and splash, and are so much more likely to get the much-anticipated bite. Remember trolling speeds for dead baits is usually slightly slower than for artificial lures (between 5-7 knots).
Many recreational fishermen probably consider using dead baits in New Zealand’s game fishing waters as a little bit ‘old school’. But we use plenty of dead baits throughout our busy season – and for good reason too: in the right situation they can be the ‘go-to’ method for catching billfish in our waters.
 So give them a go when good live bait is hard to come by or when the artificial lures aren’t raising fish – or simply try pitching one back to a marlin you’ve teased to the boat, and see what happens!
A pitched bait, will (generally) only be in the water a couple of minutes at the longest before getting a bite, so usually we don’t bother sewing the belly up, as it’s just one more thing that can possibly inhibit the hooking-up process.
Trim the remaining tag-ends, remembering that this is your last knot, so you don’t want it to come undone.
Depending on whether your bait is to be used as a pitch-bait or trolled skip-bait determines if the belly needs to be sewn up. Obviously if it’s a trolled bait, the belly will wash-out faster if not sewn up.
 |
This article is reproduced with permission of |
Fishing Reports Visit Reports
Manukau/West Coast Fishing Report - 15/10/26
Big spring snapper in 60 metres. The El Niño weather pattern isn’t going to be... Read More >
Rotorua Fishing Report - 15/10/26
Solid start to the season! The Rotorua lakes have all started the season well, and... Read More >
Tutukaka Fishing Report - 15/10/26
Big snapper in shallow. Things remain relatively quiet on the fishing front out of Tutukaka,... Read More >
Tauranga Fishing Report - 15/10/26
Bait and temperature on the rise. It’s been great to get out and see some... Read More >


Friday 23 October 2026
Major Bites
 - -
- - Minor Bites
 - -
- - Saturday 24 October 2026
Major Bites
 - -
- - Minor Bites
- -
Comments