
Downrigging for Kingfish
 Downriggers are not heavily used by New Zealand anglers.
While trout fishers deploy them out on the deeper lakes and they are occasionally dragged out on game boats to send live baits deeper when marlin fishing, or to tow swordfish baits/lures on still autumn nights, their usage for local saltwater sportfishing is low at best. Most downriggers seem to occupy space in the bilges or sit propped against a garage wall.
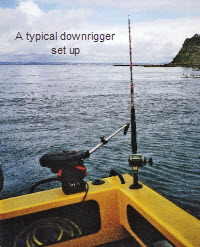
I’m sure most readers will know what a downrigger is, but for those who don’t, it’s a device fitted with an adjustable length of wire/braid with a weight on the end. The latter is clipped to fishing lines, enabling a bait or lure to be presented at depth. The downrigger spool operates in a similar fashion to a fishing reel, with a drag mechanism controlling the lead weight’s rate of descent, holding it firmly in the desired position afterwards, and having a manual or automatic mechanism to retrieve it all again at the end.
A release clip serves to connect the fishing line to the weight. Weights (typically lead) are generally between one and five kilos, depending on the depth and conditions of the location being fished and the robustness of the downrigger model used. The rigger’s line is held clear of the boat via an arm or boom, and the better models generally have a line counter.
What downriggers?
There are numerous downrigger options available to suit a range of budgets (brands Scotty and Cannon spring to mind). Electric versions are generally more expensive, need a little bit more care and maintenance, and require a 12V power source. However, their ability to rapidly retrieve the ‘rigger weight upon hooking a fish arguably makes them worth the extra cost.
There are also DIY options: downriggers can be easily made by attaching a braid-filled, heavy-duty reel (a Penn Senator 9/0 or similar) to a stiff, bent-butt rod. Apart from being a low-cost alternative, this kind of setup can double as a teaser rod and/or hapuku rig – certainly advantageous on space-limited trailer boats.
Why use them?
 One of the best applications for downriggers in New Zealand (besides targeting trout and billfish) is slow trolling or drifting live baits for kingfish. I used to consider downriggers unnecessary when live-baiting for kingfish – an over-complication given that traditional methods (i.e. drifting with running – sinker rigs etc) work just fine. However, after using them for a couple of years now, I’ve come to realise that they provide a wealth of advantages over old methods.
For a start, the use of downriggers in conjunction with a quality fish-finder effectively maximises the time your bait spends in the strike zone. If kings are being marked on the sounder 40 metres down, it is easy enough to drop the baits straight to that depth – as indicated by the downrigger depth counter – and keep it there. However, should the kings then come through on the sounder at 20m instead, all it takes is the push of a button (on electric models) to bring the baits efficiently back up in front of kings’ faces. While the same is possible using traditional methods, downriggers remove most of the guesswork in gauging exactly where your bait is in the water column, and makes the transition from one depth to another as smooth as possible.
Also, as the mainline detaches from the downrigger weight when a fish strikes, the baits are presented much more naturally, leaving the fish free to swallow and run off with it without any sinker weight interfering. The same applies to the angler, as he or she can then hook and fight the fish on a direct line free of any sinkers swinging or sliding about on the mainline. When using traditional methods, sinkers can: interfere with hook-ups; damage the main line (leading to a break in extreme cases); and unnecessarily agitate a hooked fish, causing it to dive for the safety of structure.
Furthermore, depending on the rig used, sinkers can be very detrimental to a fish’s health should it escape with one still attached.
Downriggers in action
 The nature of downrigger fishing means most of the fish-catching ‘work’ occurs with the rod sitting in the holder, while the depth, speed and location are determined by the person driving the boat and perhaps someone else controlling the downrigger’s depth. Many seasoned anglers may be put off by this concept, however, when faced with trying to put junior or novice anglers onto quality fish, the method is ideal.
I’ve often heard that ‘rigger weights and wire hum can scare away fish, but from what I’ve seen – at least with kingfish – quite the opposite occurs, with the ‘rigger weights seeming to really fire them up! They act like a giant jig, and it is not uncommon to get bites as the bait is being deployed, or to see a pack of hungry kings chase a retrieved ‘rigger weight to the surface.
It is usually only feasible to run two baits at once from most vessels, but by staggering the baits (both in terms of distance behind the boat and in depth deployed) means tangles are nearly non-existent. Typically, I run one short, with the mainline clipped five metres or so behind the ‘rigger weight and one a bit longer – say 10m or so. One bait will also be run a bit shallower than the other – at least five metres difference in depth to avoid tangles, and potentially much more if you want to cover more of the water column at once.
As is the case with all live-bait trolling scenarios, slow is generally best (both in terms of the number of strikes you get and for live-bait longevity). A walking pace (1-3 knots) is generally effective, especially if you are marking fish, although baits will handle short periods of being towed slightly faster if you need get back on the spot or want to cover a bit of ground during a quiet, fishless period.
Hooking kingfish on downrigged baits is dead easy, and made even simpler by using lever-drag reels and circle hooks. Rods are set – in the holder, the excess belly wound out of the line, and a light drag set – just enough to stay reasonably tight to the ‘rigger weight and to stop line creeping off when trolling. A drop-back-like effect occurs when the bait is eaten, as slack is introduced when the mainline is pulled from the clip (usually a strike is noted first by a sudden decrease in pressure on the rod). By the time the weight starts coming back on the rod and line starts to leave the reel, it is simply a case of sliding the drag up and watching the rod bend over.
While this is the ‘textbook’ scenario, I find kings have a frustrating habit of knocking the bait from a ‘rigger clip before coming back to eat it after a short delay (anywhere between 10 and 60 second). Continuing to drive ahead after a bait is pulled from the clip can mean a missed opportunity, because the bait tends to be lifted out of the strike zone by water pressure on the line. Consequently, a better ploy involves throttling off or putting the boat into neutral any time the ‘rigger clip pops.
Clipping the mainline to the ‘rigger weight can be done in many straightforward ways, so I won’t go into details; commercial release clips, rubber bands, clothes pegs etc, all do the job. As long as the mainline is attached tight enough to hold the bait in place, but lightly enough for king to pull it from the clip with relative ease, it doesn’t really matter what system you use.
Bait rigging
You need to attach your live bait to the hook firmly so it handles deployment and retrieval, towing, and being pulled from the downrigger clip on the strike without tearing off the hook. Simply hooking the bait through the nose will suffice, but is a poor second choice to bridle-rigging, which enables the baits to swim relatively straight and level, minimising tangles and line twist. Like any live-baiting situation, check your baits regularly and make sure the fittest, healthiest baits you have are on the end of the hook(s).
The depth attainable by a down-rigged bait is really only limited by the amount of ‘rigger cable, the size of the weight, the boat’s speed and the prevailing conditions (current, wind etc.). I’ve sent baits to the bottom in 100m in the past, although they’re probably best suited to fishing 30m to 80m depths.
In all cases though, it pays to keep a vigilant watch on the depth of ‘rigger weight in relation to the water depth you’re fishing, especially if you position the bait right down near the bottom. Yanking on a length of 200lb wire cable to free a snagged ‘rigger weight is not much fun. It can therefore help to set a depth ‘limit’ (i.e. never put a bait within 5m of the bottom or whatever distance you deem suitable for the prevailing bottom structure below).
Remember when trolling that there will be a degree of ‘blowback’ in the gear, meaning your downrigger weight will be positioned slightly shallower than the line-counter indicates, an effect that becomes increasingly apparent the faster you travel. So take this into account, especially when speeding up or slowing down.
Down-rigging may sound a bit complicated and something of a hassle, but in reality it’s a very simple, effective and straight-forward process that keeps the potential for stuff-ups and missed opportunities to a minimum.
When live-baiting in medium depths, downrigging ticks all the right boxes for me – so I recommend dragging that dust-covered downrigger out of the garage and giving it a proper try this summer!
|
|
This article is reproduced with express permission of |
Fishing Reports Visit Reports
Tauranga Fishing Report - 28/05/26
Tarakihi on the bite Trips are few and far between at this time of year,... Read More >
Canterbury Fishing Report - 28/05/26
Fresh and salt turning it on! It is not very often I get to say... Read More >
Bay of Islands Fishing Report - 28/05/26
Lures paying dividends We finally had a break in the SE winds that have been... Read More >
Manukau/West Coast Fishing Report - 28/05/26
Snapper and gurnard in the harbour The weather has finally taken a turn for the... Read More >


Major Bites
Minor Bites
Major Bites
Minor Bites
Comments