DIY Lure Building
Printed From: The Fishing Website
Category: Saltwater Fishing
Forum Name: Hints,Tips and How To's
Forum Description: Rigs, tackle, baits, angling techniques, tips and hints & your DIY projects here
URL: https://www.fishing.net.nz/forum/forum_posts.asp?TID=57080
Printed Date: 25 Oct 2026 at 4:18am
Topic: DIY Lure Building
Posted By: ReelAppealLures
Subject: DIY Lure Building
Date Posted: 03 Sep 2010 at 2:00pm
|
Making a Lipped Stick Bait In this "How to" I am making a lipped stick bait that is 175mm long and will be around the 2-2.5oz mark when finished. Wood used is Radiata Pine 35mmx35mm.
Tools used-
First up I grabbed a piece of 35mmx35mm pine and cut it to the exact finished length I wanted the lure to be. I marked out where I would like the eyes on the lure and position of the belly swivel and weight.  Over to the drill press where I used a 1/2" forstner bit for drilling out the eye socket, I guessed the depth I would need as I can always touch it up later if they are too shallow.
 Still at the drill press, now drilling the belly weight hole and the swivel hole, I drilled down to just below the centre line.
 All that is left before turning the lure is to cut a slot so I can fit a metal lip later on.
 I marked the block on the ends to find the centre by drawing a line from corner to corner and mounted the piece in the lathe.
 Started turning the block down to a round piece of wood, and cut in to end of the piece to mark how big I wanted the tail to be.
 Now it is just a matter of shaping the lure, keeping it simple with a nice curve.
 Finished shaping the lure, a quick touch up on the eye sockets to even the depths out and then started sanding, working from heavy grit to fine.
 Now I have fitted the jacobs chuck to the lathe with a 4.5mm long series drill bit.
 Now this is why it was important to start with the block of wood the exact length I wanted the lure to be, I have two perfectly centred marks from the spur centre and live centre on the lathe from when the lure was turned. Now it is just a matter of setting up the lure.
 Slowly feeding the lure into the drill bit, making sure I back the lure out and clear sawdust and chips out every 25mm or so. Be careful as if the drill bit gets too hot they can snap in the wood ruining both a good lure and bit. I kept drilling untill I had got to the hole closest to the eye.
 Perfectly centred hole in the lure.
 I have now got to mark where to drill for the wire to pass through the metal lip. The tow point is lower than centre so I fit the lip and mark where I need to drill from.
 Now it is pure guess work from here, I need the hole to line up with the hole I drilled from the tail through the centre of the lure. I spent a little time making sure I was straight and on the right angle and then went for it.
 Now with all the drilling done I can fit the belly wieght, 7mm diameter and around 6grams cast from lead. Fit the wieght and then apply some wood putty or car filler (bog) to the hole and let dry.
   I will carry on this thread and the lure when the filler drys, time for a cuppa.
|
Replies:
Posted By: kadin32815
Date Posted: 03 Sep 2010 at 2:13pm
| cool report with everyone having a go im tempted to start one my self its just a mater of clearing off the lathe lol is pine the best wood or would somthing lighter be beter like popler might see if the old man can rig my up a long drill bit to |
Posted By: ReelAppealLures
Date Posted: 03 Sep 2010 at 2:33pm
|
Go for it kadin, Pine is ok to use but there is no limit to what you could use just it may be better suited to a certain style of lure because of the woods density etc...
|
Posted By: Capt Asparagus
Date Posted: 03 Sep 2010 at 3:16pm
| Brilliant post.... great stuff man. Looking forward to seeing the rest of it! |
Posted By: ReelAppealLures
Date Posted: 05 Sep 2010 at 7:41pm
Ok now the wood filler has dried and is able to be sanded back.
 Now is the time to touch up any thing on the lure, sanding out scratches etc.
The lure now needs to be sealed, an unsealed lure can swell and crack/split which won't be any good to anyone.
The product I have been using lately is Norski Epoxy Timber Sealer, works great, long pot life aswell 24hrs. As I was only coating 1 lure I mixed up 3grams of the base and 3grams of the hardner using some scales ( wait till the mrs is out)
 I brushed on the coating allowing it to soak in, recoating dull patches. I make sure to load the brush and pour sealer in to the belly swivel hole untill sealer drips out of the hole at the tail and the nose. Then I placed the lure on a nail to dry.
 Another alternative to epoxy sealer is a 60/40 mix of boiled linseed oil and turpentine. Just submerge the lure in the mix for a half hour, remove and let dry completely (about 2-3 days)
 |
Posted By: ReelAppealLures
Date Posted: 05 Sep 2010 at 8:23pm
Epoxy sealer is dry and has had a quick scuff up and is ready for paint. I usually dip the lure in some waterbased enamel and hang up to drip/dry. This gives you a super smooth finish and covers imperfections really well. I didn't want to wait another day so I just sprayed on some opaque white with a airbrush.
   The airbrush paint I am using is waterbased Createx Colours. I am no expert with an airbrush or mixing paints by any means so this stuff suits me well, no mixing required shoot straight from the bottle, no mask or horrible smells and is cured by heat ( I use the mrs's hair dryer ) . Can be masked over minutes after being cured and the colours are transparent so they fade well and build slowly giving total control.
 I had no real idea for a paint scheme so went with the flow, dark colours down first.
     Turns out its a rasta lure...Now is the time to mask up for stencil work or holo tape. Found this cool tape at Mitre 10 its Aluminium tape used for plumbing works great and can be polished up real shiny.
 I masked the whole lure as over spray sucks, marked where the eyes are for reference and sketched out some quick lines to cut out.
  Sat down with a razor blade and cut out the stencil designs, I must buy an exacto knife much more user friendly.
 |
Posted By: Murph
Date Posted: 05 Sep 2010 at 8:33pm
| Awesome post again, thanks. |
Posted By: ReelAppealLures
Date Posted: 05 Sep 2010 at 8:41pm
|
Before starting to paint the stencil design I made sure the tape was stuck down hard so paint hopefully won't bleed through, give the tape a rub with something round and smooth. Here the stencil design is blacked over, tryed to add some white for "hot spots" but never really came out how I would have liked ohwell.
  Couple of quick coats of clear and shes all done.
 Now I usually finish the tail of the lure with a tail grommet but thought I would try something different. Grabbed a 1/2oz ball sinker and put in on the lathe. Lead will machine with normal wood chisels really well. Turned down the sinker and left a 4.5mm spigot to centre it on the lure.
   Now I can assemble the lure, will need a belly grommet, rosco swivel, metal lip, tail weight, 1/2 " 3D eyes and wire. The lip, grommet, tail weight and eyes are stuck in using some 5min epoxy.
    Now I can thread the wire through making sure it goes through the swivel eye and finish off with a tail wrap. I doubled back on the wrap as it look better I feel.
 Heres the finished lure ready for epoxy. Finished up being 3oz. Enjoy and have a crack yourself, poppers are a great lure to start on and go from there.
      |
Posted By: blunt hooks
Date Posted: 05 Sep 2010 at 8:59pm
| I am impressed. On average how long from start to finish to make 1.You are 1 clever man.Thankyou for sharing your knowledge with us. |
Posted By: ReelAppealLures
Date Posted: 05 Sep 2010 at 10:57pm
| Hi BH, I can layout and turn a lure in 5-10mins max, allow 30mins for a finish paint job ( most of this time is cleaning the airbrush for colour changes ) Rigging a lure takes couple of minutes. Waiting for epoxy/base coats to dry takes the most time, but I have lures at all different stages so there is something to do all the time. Making a lure that swims properly takes days and days of R&D but once you know what needs to be done for that particular lure your set. Poppers are easier because of its style of action. |
Posted By: Capt Asparagus
Date Posted: 06 Sep 2010 at 8:51am
|
So is this a bibbed minnow or a popper or a stickbait? That bib looks pretty booty, will surely give the lure a helluva kick. Would it have been better to have tapered the nose a little, will not that flat face interfere with the bibbs action? Brilliant looking lure, not criticising at all, just asking... |
Posted By: ReelAppealLures
Date Posted: 06 Sep 2010 at 9:40am
Hi Capt, I would class this as a surface swimmer/stickbait. The lip won't make the lure dive like on a bibbed minnow, however it may if you really rip and make it dig on the retreive although this was not intended. The flat face and the bib are to increase the lures resistance in the water, a real straight forward and simple retreive will see the lure wobble/roll wagging the tail end of the lure on the surface. Will dress a single hook for the rear as the action of the tail wagging will make for a good action on the hook.
I have not yet had much luck with diving minnows as they require quite alot of tuning, but will figure it out soon. As I finish more lures I will post em up, will be casting these from shore when the kingies turn up at my local rivermouth this year. Cant wait.
 I am still trying to convice my better half that filming the lures down at the boat ramp on the water for me isn't weird
 |
 Capt Asparagus wrote:
Posted By: OffTheHook
Date Posted: 06 Sep 2010 at 10:26pm
Whoa real cool mate thanks for sharing 
|
Posted By: Big Jim
Date Posted: 07 Sep 2010 at 6:59am
| Now that man has talent!!! Awesome sambo!! |
Posted By: Lethal
Date Posted: 19 Sep 2010 at 12:59pm
|
i think you have done a fantastic job RAL, can i just add this, please dont take it the wrong way im just trying to help. ive made thousands of bibed lures and poppers in my time your design is really radical, i do have my doubts about it being easy to retrieve though, with the tow point being low which will make the bib come into effect and the flat head combination will create a lot of water pressure while trying to retrieve fast, if thats what your intention is, i feel it will roll out when trying to wind at any speed, but hay its a start and you live by experimenting right? tell you what i do like which i haven't seen for years now is a propeller in front of a lure that skips across the surface... these used to be dynamite on kings but they dont sell them anymore... ------------- Thanks for everything you did for us Eric. may you rest in peace, You were one of the real legends of NZ recreational fishing |
Posted By: felixx
Date Posted: 19 Sep 2010 at 6:44pm
|
Tell you what man,
If you want to sell some, I would buy a couple.
Oh to have a garage setup like yours..
------------- Originally posted by TG LMAO felixx, you a sick puppy! hehe |
Posted By: ReelAppealLures
Date Posted: 20 Sep 2010 at 7:05am
Hi Lethal,
The lure is called a " Danny " originally made by Danny Pichney an American lure builder... You are right and it is not intended to be retrieved quickly, it is a surface lure that has more of a struggling, flopping, helpless movement like a wounded bait fish. You can tune it by bending the eye down and the lip down to create a shallower, wider wallowing roll, skating across the surface, or bending the eye up and the lip up creates a quicker side-to-side bustling wake, head down bulging barely under the surface, pushing water in a tight vee wake...well at least thats how it should fish.
Its all good fun though
 , Next I will try a darter from his collection. |
Posted By: ReelAppealLures
Date Posted: 20 Sep 2010 at 7:32am
Hey felixx, I will let you know when I have some that are for sale, haven't got much done lately have been distracted by actual fishing
You don't need a whole lot of gear to make a lure, look at what Murph and Falco have done both really well made with the bare minimum of tools and they catch fish.
|
Posted By: Lethal
Date Posted: 20 Sep 2010 at 8:40am
|
Awesome RAL, like a plopper of old but rolls, which is jerked at intervals as if it was on its last legs dieing on the surface, nice. your paint jobs are truly fantastic and attention to detail is exceptional love your work RAL. ------------- Thanks for everything you did for us Eric. may you rest in peace, You were one of the real legends of NZ recreational fishing |
Posted By: Murph
Date Posted: 23 Sep 2010 at 9:17pm
Here's my latest efforts.....
    I'm really happy with how the black one has worked out, not quite so pleased with the blue one, but they are all just experiments at this stage. I'm going to have to get an air brush and learn how to use it before I can get any better finsihes than these.
I learnt a bit from the first ones I made as I had to stuff around a bit with ballast until I got a reasonable swimming action from them. Consequently I have changed the shape a bit on these ones and have checked the ballast in a tub of water before painting them up so hopefully they will swim well first up.
|
Posted By: ReelAppealLures
Date Posted: 24 Sep 2010 at 6:50am
|
Ah sweet Murph those sticks just keep getting better, the whole ballast thing takes a while to get right. Just taping on some lead in the spot you want it is a good place to start, then you can easily move it if it is wrong. I am always amazed how less is more in some cases.
Might have to up my game
|
Posted By: Murph
Date Posted: 25 Sep 2010 at 7:02am
| I've got the weight in the belly just forward of the wide point and in the tail. Its a bit of a guessing game at the start but I'm beginning to understand the dynamics involved. The previous ones I made were a bit too tall in their aspect ratio, (width x height), and I had to add quite a bit of weight to stop them from just rolling over on theirs sides. I eventually got them to swim reasonably well but with these ones I have fattened them out by reducing that aspect ratio, (making them more cigar shaped), I think it will work better. |
Posted By: Bungel_
Date Posted: 26 Sep 2010 at 3:50pm
|
Where are you sourcing all your grommets/ weights, wire from?
------------- here fishy, fishy fishy..... |
Posted By: Murph
Date Posted: 26 Sep 2010 at 3:59pm
|
Grommets = The heads off of pop rivets. Weights = Melting lead into a hole drilled in the lure body for the ballast and small sinkers bought from a tackle shop fitted over the wire for the tail weights. Wire = 1.6mm stainless wire that I bludged off a local engineering outfit. RealAppealLures is a whole lot more tidy & sophisticated than my No:8 wire approach to building lures but I'm happy to say that the latest two models were tested today at the Ohiwa wharf and they actually have a pretty nice action. |
Posted By: Bungel_
Date Posted: 26 Sep 2010 at 5:35pm
|
i like your ideas d00d. Would save a whole heap of money and hassles if i do it like that. Ive been turning a few poppers out on a mini lathe for about a month. I have gotten to the stage now that i need to start kitting them out with grommets and such. Have found some great american sites njtackle.com and saltybugger.com . They have all that i need but arnt too keen on sending international without getting pictures of credit cards and other forms of ID.. *Get F*ed. I found a pretty messed up site, but has some great info though. Lurelovers.com , there are some insane ideas on there, even stuff about transfering the skin from your bait fish onto your lure.. weird but looks amazing. Will add some pictures up here once i get a few closer to finishing. Great read up R-P-L!!! I have been using a self centering chuck instead of the live center. Its been great because i can finish off the whole lure, including the concave face and make several pieces from the one length of wood. It takes a bit of time to set it up nice, then to bring in the tailstock in to give it a bit more stability while i give it some shape. Its very easy to drop the piece off, and only requires a quick sand on the tail. ------------- here fishy, fishy fishy..... |
Posted By: Murph
Date Posted: 26 Sep 2010 at 9:18pm
| A lathe is very much on my to do list, would speed the process up a hell of a lot that's for sure. |
Posted By: Murph
Date Posted: 07 Oct 2010 at 1:29pm
|
Something different for this thread, some big fish lures I've been working on.... Marlin lure...  Big teaser lure... 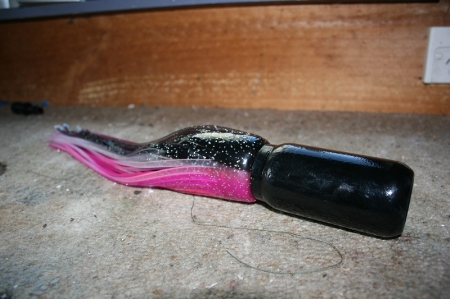 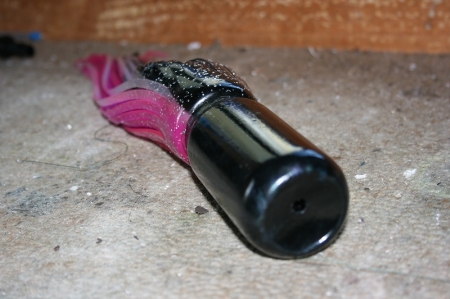 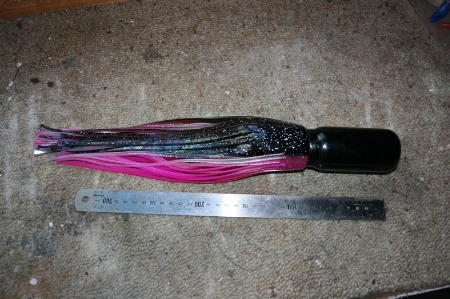 |
Posted By: ReelAppealLures
Date Posted: 07 Oct 2010 at 3:20pm
Bungel, I have sent you a PM in regards to Scott at saltybugger.com
|
Posted By: ReelAppealLures
Date Posted: 07 Oct 2010 at 3:30pm
Sweet Murph, I like the lure at the top, but the more natural at the bottom probably is the money
Now knowing your "macgyver" style, what was used? Are they resin heads?
ps. Did you end up trying any of those other epoxy's we talked about for a finish on your stick baits? I need to blow the dust off my lure bench and pull finger, I have a cool paint job lined up next and want to make some realistic (as I can) kahawai stick baits.
|
Posted By: Murph
Date Posted: 07 Oct 2010 at 5:12pm
|
I still have quite a bit of the Enviro Tex Lite so I won't try those other brands until the E-Tex is gone. I can get Norski Doming epoxy at the local hardware shop so will try that next. The top lure in pink is just a resin filled piece of PVC pipe with the face cut off on a 15 degree angle, its been tested and it works fine, pops, plunges, smokes and wiggles. The big teaser is an old medicine bottle filled with resin. I built the back of it up with more resin and carved out the grooves for the skirts to be whipped down into, then painted the head black for some contrast, (I will probably finish it off with a coat of E-Tex as well). The overall length of the lure is 400mm, it has also been tested and with its concave face it pops really nicely and gives off an awesome bubble / smoke trail, it wiggles and giggles too but a lot slower than the smaller lure with the slant face. |
Posted By: ReelAppealLures
Date Posted: 07 Oct 2010 at 6:07pm
| Sweet Murph, may just be the "medicine" on a nice fish too. Amazing how so many things around the home can be used for lure building...and what limits you is your imagination. Found some nice holo tape in a variety of different colours at the red shed in the craft bit. Also got some of those round sticky dots, big white ones for the background of a eye and some smaller black ones for the pupil....couple of thousand in a box so thats plenty of stick bait eyes. |
Posted By: Bungel_
Date Posted: 09 Oct 2010 at 4:37pm
|
choice, thanks for that message. Have been to spotlight and bought a few bits and bobs, some eyelets that i could use at grommets for finishing off the holes. Not sure if they will be the best thing to use, expect any hint of salt water on them and they will corrode real quick. But will use them on a few test runs anyways.Will need to seal them up real good with the epoxy finish. Also got some 100% acrylic wood sealer, have not been able to find the epoxy stuff. Think this stuff will work ok with a bit thinners and a decent dunk. This is the little beast i have been working on at the moment. a large 'dumbell' style popper made from white oak. Floats really well too. 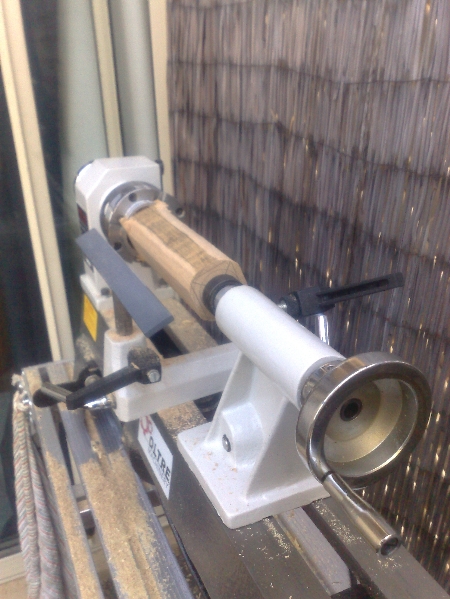 The piece of white oak just after a quick spin on the lathe. Hate starting out on these bigger pieces of wood. 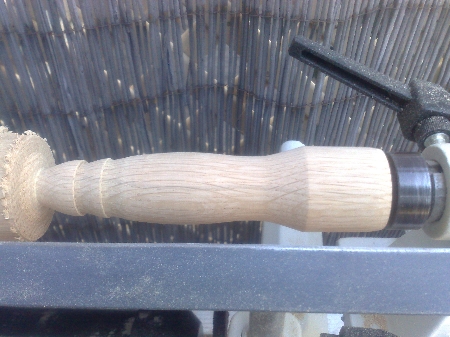 The basic shape of what i was trying to achieve. 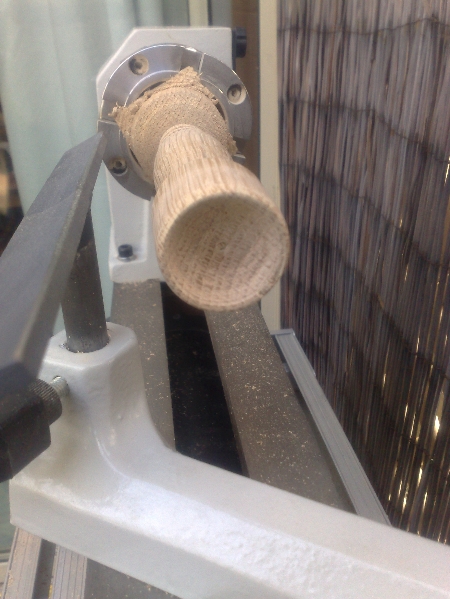 Have beveled out the face. 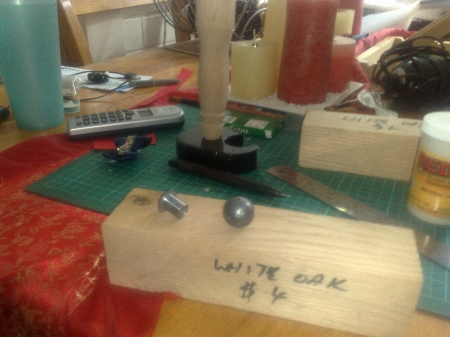 Took the idea to play around with ball sinkers on the lathe. It worked out great, and will definatly be better than buying stuff from over seas. Just wish i had all the kg's of sinkers here that i have sitting back in NZ...!!! oh well.. 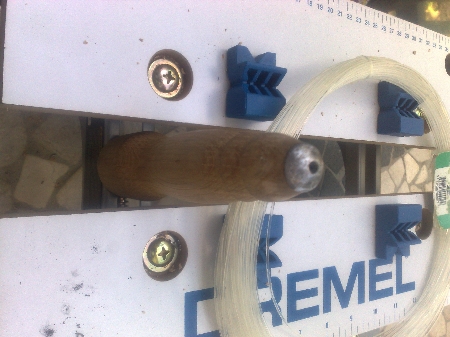 Have drilled the through wire hole and finally got it connect up right through with a little playing around. One of the disadvantages of using a self centering chuck, and not the live center. 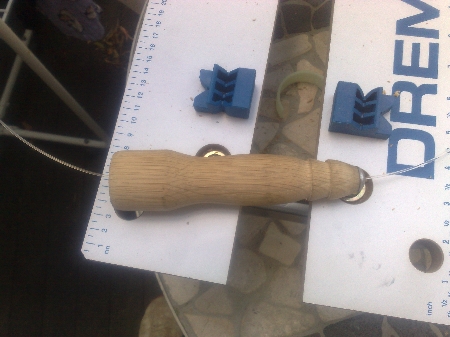 The current product sanded down with weight added and some 300lb mono threaded through. Will now be sealing the beast with some 100%acrylic wood sealer. Hope it does the job.. ------------- here fishy, fishy fishy..... |
Posted By: JTF
Date Posted: 12 Oct 2010 at 4:31pm
|
Great thread RAL For you peeps that dont have access to a Lathe,and me being in the trade I have lots of turned chair legs,stair balustrades,rejects mainly kicking around. PM me if your interested in any. |
Posted By: Capt Asparagus
Date Posted: 12 Oct 2010 at 4:45pm
|
Any thoughts on using heavy nylon for the main attachment thru the body of the lure? (As above). I know Black Magic had cheap little poppers they got from SA yonks ago that you just ran your trace thru the tube in the middle of the popper, tied/crimped on a treble at the back and off you went. Worked well in the Sollies when I used them there for a year or two, and if the fish did bite off the hook or the lure, then the wooden body of the lure would float free... I was able to rescue a couple of lost lures from fish this way. They kept the hook, I got the lure back. For a centre hook, using a swivel up from the belly hole thru the body, would having heavy-say 400lb mono- nylon trace be that much weaker or more prone to failure than a metal wire that it would result in lost fish? If you were to crimp on a sleeve just in front of where this swivel sat on the mono, it would stop the line from being able to be pulled thru the hole ....(hmmmm... I know what I mean).... so you wouldn't have a big belly of trace being pulled out of the belly-hole if the fish were hooked only on that hook. And again, if in places where fish are more toothy than here, if the mono was bitten off, you would get these lures back perhaps. Given the investment in time/materials on these poppers etc, that would have to be worth losing a treble or two? And of course, there is no reason you could not just insert your own single-strand stainless wire trace instead of mono. You can pick up 200lb singlestrand in chandlery shops fairly easily, and it is an easy job to whip up a nice haywire twist on such wire. Just a thought.... |
Posted By: Double Shot
Date Posted: 12 Oct 2010 at 6:12pm
Cheers
Craig ------------- 70ml of 90deg C water pressurised through 13g of roasted finely ground tamped coffee for 25sec's to make a distinguishing sensory hit called a Double Shot |
Posted By: ReelAppealLures
Date Posted: 12 Oct 2010 at 6:29pm
Don't worry CA I understand you!
I can't see there being any problem with that on say a normal concentric popper for eg. Some lures it wouldnt work on where you need to tune it by bending eyes etc.. Some lures may also need a loop to loop connection with the trace running through the lure as you know some lures fish better with a loose loop rather than pulled up tight.
|
Posted By: JTF
Date Posted: 13 Oct 2010 at 8:00am
No no,just lots of turned legs etc,i live in Indian free state,Te Horo,Kapiti coast. |
Posted By: Bungel_
Date Posted: 15 Oct 2010 at 12:29am
|
I have pondered the idea of using mono, but wouldnt go down that route
personally. Though i dont see any problem for the boaty, could definatly
be advantageous to be able to recover the lure. But if you are being
bitten off then surely steel trace would help eliminate that from
happening.. and if the weakest link in the chain is above the popper
then you would be loosing it anyways if something were to fail. I want to be making these lures as strong as possible to be used off the rocks, I am currently looking at 1.6mm stainless steel wire. Might be a little too strong though, as its been difficult to master locking the eyes up tight. Would live to find some 1.4 or 1.2mm... Im currently using welding rods from work, still to find a supplier of any sort that can supply the wire i need here in Perth. ------------- here fishy, fishy fishy..... |
Posted By: ReelAppealLures
Date Posted: 16 Oct 2010 at 2:54pm
Are you able to source annealed wire? will be a little easier... I put a few picks of how I have been doing my wraps http://www.fishing.net.nz/asp_forums/what-i-made-today_topic56341_page3.html - http://www.fishing.net.nz/asp_forums/what-i-made-today_topic56341_page3.html
May make it easier for you? Let us know how you get on.
|
Posted By: Bungel_
Date Posted: 06 Nov 2010 at 2:09am
|
I have stuck it out with the 1.6mm 316 Stainless Steel marine grade welding rods and have been able to sort out nice round eyes with 3 twists to neatly lock them. Have tested them to 40kg breaking strain on some digi scales. They didnt budge on 40kg so expect they will handle much much more. Bought a few decent poppers the other day .. 100, 125 and 150gram designed for GT fishing and built to a very high standard. $100 + worth of lures, they are great to look at and see how the pros have done it. I also got some .9mm 306 SS wire off an old coil for welding. Will give that a test out this weekend, but looks to be a little thin for what i want, even though it might do for strength, just looks thin. Also not being Marine grade 316 i will probebly not use it. Will put some pics up this weekend as i will be adding some colour on sunday, hopefully. just need to give a few more coats of white Purchased a marine grade varnish for the final product, Hope it works out. Would rather be using an ultra clear epoxy but its more than double the cost. and not even half the amount. Will use it for securing in the eyes and filling in around the eyelets once i have finished the through wire. ------------- here fishy, fishy fishy..... |
Posted By: ReelAppealLures
Date Posted: 06 Nov 2010 at 9:46am
Sweet, look forward to seeing some pics Bungel. I wouldn't worry to much if things aren't Marine grade, the lure will be lost or in need of re-rigging swivels etc.. well before rust/corrosion weakens the wire. Just remember to wash and dry your lures after fishing.
|
Posted By: Don18025
Date Posted: 10 Nov 2010 at 2:58pm
|
RealAppeal Your postings have really got me going, I have started making my own floating stick lures. I am fortunate I found an excellent craftsman with a lath (as I have none) and he has turned for me some basic shapes to get started. I have had a battle drilling the vertical holes straight, but now have them in place.....the offsets will be filled with epoxy. Next steps are placing in the lead ballast, the pencil ones will be in the tail and will be epoxied small lead weights, then I will shape them on the belt sander - put flat sides, sloping heads and then the paint job and placing hooks. I have no idea which and what idea will work, but they will look good on the boat (tackle box or on the dash). 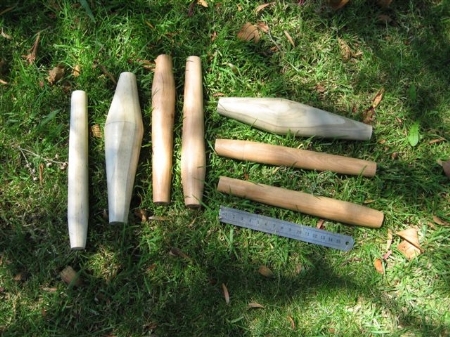 Your tips and excellent examples are great to follow, and I will keep you up to date with progress. I need them to be finished before the Xmas cruise. Don |
Posted By: Bungel_
Date Posted: 14 Nov 2010 at 2:21am
Here is where i am at so far. The set up with a bit of oak to test with.  Soon realized i would need a bigger tool test for the larger lures and that a Self Centering Chuck would very advantageous for doing the cupped faces. more $$'s!!   I did some tests on the trial wood i had bought for floatation - Oak and pine, just stuff i picked up from bunnings. The pine was really light and the oak way too heavy and sank. Checked out some other wood and found White Oak, heavy but had good bouyancy. This is the first decent piece i started to work on with the White Oak.   After a little sanding.  After putting a bit of cup on the face of the popper - the main advantage of using a Self Centering Chuck. Have found them very hard to perfect and make deep, had a few pieces split on me and take chunks out when the tools caught.. might just need to speed up the lathe and sharpen the tools some more.  After a further sanding i took it off the lathe to start the drilling process - through wire, belly hole, tail hole for casting weight and one for the face to fit a grommet in.  Had a little trouble getting the two holes to meet up, but worked out. the wire threads through nice and tight. Was testing it out with 300lb mono thinking i might be able to use that if i couldnt get the holes to meet up properly.  Drilled a 10 mm hole for the casting weight to fit into.  Took the idea that someone had posted on here for making the tail weights from ball sinkers. They work out perfectly. Very solid and tidy when fitted in.  Now comes the painting part - and am still in the process of finishing off the lures but will show where im up to. Decided to go with some White Knight paints , called Splashes. All the standard colours in both oil and water based along with fluros. They are Acrylic Enamals, i went with water based. I also gave the lures a a few coats of 100% Acrylic wood sealer firstly followed by a light sanding.  I made up a little jig to make it easier to paint the lures and turn them. Much better than trying to hold them with a bit of wire.  After 3 coats of White.  Decided to give it a weigh at this stage with all the metal added in and only the final painting to be done. Came out at 120grams (White Oak), and the other one being 100grams (Pine). Very happy with that as those were the weights i was aiming for.  The masking process before colour is added and stickers.  Its been great thus far to get these lures made. Will post up the final products when they are done, hopefully in the next few weekends.  ------------- here fishy, fishy fishy..... |
Posted By: Bungel_
Date Posted: 14 Nov 2010 at 2:27am
|
Sorry about the image sizes, some sites they work on.
------------- here fishy, fishy fishy..... |
Posted By: HULK
Date Posted: 14 Nov 2010 at 7:13pm
|
Hey RAL, can you please tell me what brand and type of epoxy you're using for your final gloss coat on your lures, or even just what type of epoxy i need to look for. Seems there lots of varieties of epoxy and its got me a bit confused.
Cheers
|
Posted By: Don18025
Date Posted: 14 Nov 2010 at 9:54pm
|
Fishee, I intend using Epiglass 9000 epoxy resin, used it for boat building. Mix it with micro-ballons for filling and use as an adhesive and it sands very well. Dilute the same mixture with thinner (5% to 10%) and coat whole lure, for waterproofing. Then use a special undercoat that sticks to the under coat and allows paint to stick on top. (I have some from Resene). After painting intend coating with single pack polyurethane and Uroxsys make a really good one of those. That is the plan, but I expect after my third go in about Easter next year I will have simplified it. Personally I think full waterproofing with epoxy may not be necessary (some of my lures are from treated wood, so they will not need that treatment). You do not go fishing every hour of every day, the lures are only immersed for a short time and dry out the rest of the time. So waterproofing may not be necessary. I will try anything and I am enjoying shaping these, it is a new hobby and hopefully will land a few big ones. |
Posted By: HULK
Date Posted: 14 Nov 2010 at 10:08pm
|
Thanks Don, I've been water proofing my lures by submerging them in pigmented sealer and it seems to do a fine job of sealing/undercoating them, also fill all the holes. I'm more interested in what to do after I've finished painting all the colours and want to gloss it up with something nice and hard and durable. Was of the understanding that this was done with some form of epoxy? Paint person at hardware shop told me that a polyurethane wouldnt stick to paint as it needed to penetrate the timber a bit. But never really know if they can be believed |
Posted By: ReelAppealLures
Date Posted: 14 Nov 2010 at 10:34pm
|
don/hff,
My final epoxy coat is Envirotex epoxy ( google search will fill you in )
You could use 2-pak poly urethane, but to achieve the same build of finish as E-tex will be around 50 coats!
As for water proofing the lures before paint, the easy way is to soak the lure in a 60/40 mix of boiled linseed and turps. With not sealing the lure you run the risk of the wood splitting and warping.
|
Posted By: Murph
Date Posted: 14 Nov 2010 at 10:57pm
| Stupid question but is boiled linseed something you can buy or do you need to get the oil and boil it yourself?? |
Posted By: Bazzman58
Date Posted: 15 Nov 2010 at 9:18am
You can buy it from most hardware or paint shops. ------------- We all have one that got away.. |
Posted By: Don18025
Date Posted: 15 Nov 2010 at 9:52am
|
Thanks for that info RealAppeal. Yes makes sense now. Your advise and knowledge make you the guru. Better get out in the workshop and begin finishing these beasts. |
Posted By: HULK
Date Posted: 15 Nov 2010 at 10:05am
| Thanks RAL, will post a photo once its all done. Think its about time we had some action shots put up here too as theres so many photos of nice looking lures but not a single fish attached to any of them. |
Posted By: danjer
Date Posted: 15 Nov 2010 at 1:16pm
| This thread is enough inspiration for me! I'm gonna have a go! I'm a Cabinet Maker by trade and have done a lot of wood-turning since my grandfather taught me when I was about 10, Am now doing my building apprentiship so have access to all the products needed, Will post some pics once i'm underway!! I think i'm going to go buy some more poppers to try get my head around the whole weight placement and amount. Trial and error will be the way I guess. Any tips for weight placement etc? |
Posted By: ReelAppealLures
Date Posted: 15 Nov 2010 at 2:50pm
I agree, but can't get out fishing enough!!
I am hoping Falco has a couple of succesful pic's when he gets back from Samoa. These lures were made for him to try out in Samoa. Fingers crossed as I didn't get to swim them it was a rush job.
 |
Posted By: Bungel_
Date Posted: 21 Nov 2010 at 2:37am
|
The real buzz will be when i see some mates land a few fish on the lures i have made them. Cant wait!!!
------------- here fishy, fishy fishy..... |
Posted By: HULK
Date Posted: 21 Nov 2010 at 10:20am
|
Hi RAL, Have done my latest stick bait with envirotex epoxy like you suggested. Sure makes it look the part but have you noticed that it doesnt dry rock hard? can still dent it with my finger nail although the mark does disappear after a few mins. Think this may be a property of the product but just wanting to check that its not just me?
Also how do you apply it? being so expensive I made up the least amount possible and resorted to trying to pour it on then spread it around to try make it even, its pretty self leveling so wasnt too bad, imagine a full dunk would be best but I'm too stingy to make that much up at once.
Will put up a photo when I can be bothered plugging in my camera
|
Posted By: ReelAppealLures
Date Posted: 22 Nov 2010 at 7:11am
Good stuff,
E-tex will take around 3 days to fully harden and will go rock hard.
You may want to check that you are mixing exactly 50/50 with Part A and Part B...
As for applying the epoxy I use a resin brush, found any where that sells brushes and acetone for clean up, but I know Murph has had luck using a sponge brush also.
Mixing a whole lot to dip a lure in would be a huge waste don't do that!!
 Just paint it on like you would with any normal paint, I presume you are hanging them to dry? keep flipping the lure end for end whilst the epoxy sets up... also you may need to keep the coats a bit thinner if you hanging them and not rotating the lure whilst it drys. In the picture above of the 2 poppers you will see my proto lure rotisserie. It has a 5rpm motor that drives the lures around whilst they dry, the spring holds the lure so it doesn't flop around as that will let the epoxy sag on the flop side. You can apply a thicker coat when they are spinning but don't go too crazy as the epoxy will sag... Don't be too concerned though, I have made more mistakes than lures! and it really sucks getting to a finishing stage and mucking it up so just keep mucking around and experiment you will find something that works for you...
Good luck.
|
Posted By: HULK
Date Posted: 22 Nov 2010 at 11:25am
Should be fishing them this coming weekend so that'll be interesting.
|
Posted By: HULK
Date Posted: 22 Nov 2010 at 12:31pm
|
Heres a photo of my most recent stick bait, colours look a bit munted in the photos.
Its silver fading into blue with metalic charcoal detailing. All done with spray cans. soon see if the kings like it.
  |
Posted By: ReelAppealLures
Date Posted: 22 Nov 2010 at 7:53pm
|
Sweet man, make it swim and it should catch fish for you. Take notes also and make changes if needed...Colour won't matter as size and action is more important.
Fish em hard
|
Posted By: Murph
Date Posted: 06 Dec 2010 at 11:35am
So I got a couple of Reel Appeal Lures' poppers and have been painting a few of them up. Here are the results.....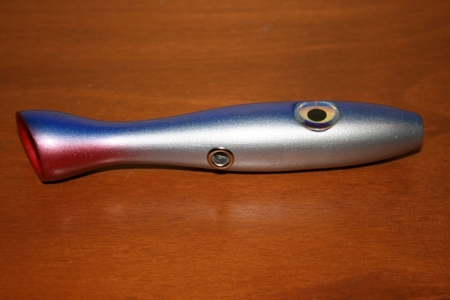 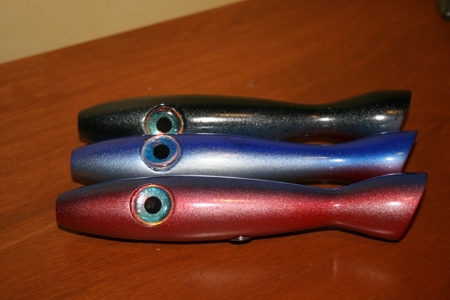 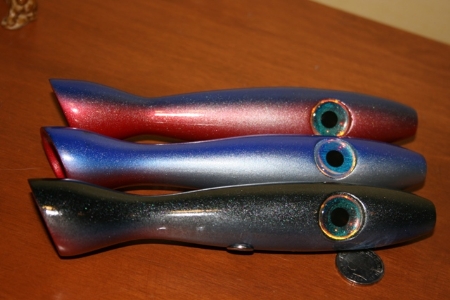 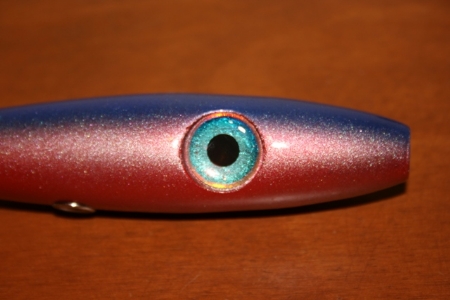 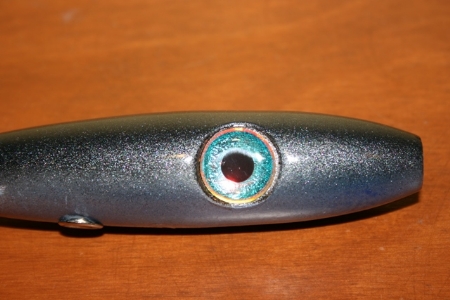 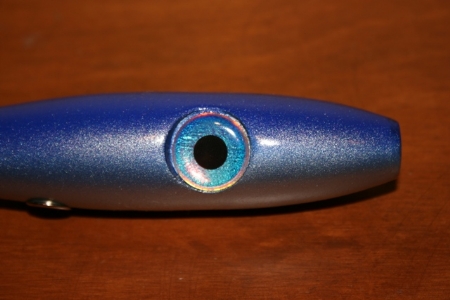 The paint jobs are nowhere near perfect but I'm getting the hang of the airbrush slowly and am pretty happy with how they look, (they actually look better than the photos show). Am getting a few coats of epoxy on to them now then it'll be time to give them a cast at some kings. |
Posted By: Bungel_
Date Posted: 10 Dec 2010 at 9:05pm
|
What are people using for masking out there lures ready for painting.?? Im having a fair bit of trouble at the moment as i wanting to do flame designs on the lure with a really nice crisp/clean edge. I firstly drew it all out ontop of the yellow base colour with green to go on top. Then cut some lengths of electrical tape into thin strips which i could stretch around the design. It all looked well masked and seemed to tack well. The end result was very bad, lots of bleeding and a very thick edge. I then cleaned it up with thinners and remasked it entirly with paper tape. I cut the design out with a craft knife and peeled off the are to paint. Again, it all looked to be great and was well stuck down. The paper tape began to lift after the second coat and again, the result was heaps of untidy lines and bleeding. Is there a certain tape that you guys use, and way of preparing the surface before masking up. I alaways give a lite sand and quick clean with thinners. ------------- here fishy, fishy fishy..... |
Posted By: HULK
Date Posted: 10 Dec 2010 at 9:18pm
| I've just used masking tape and cut it out. Making sure its really well stuck down, not perfect but definitely acceptable. but sounds like thats what you're doing too. you can get thinner masking tapes which you could try. it shouldn't lift off until you peel it |
Posted By: Bungel_
Date Posted: 10 Dec 2010 at 10:07pm
|
that sounds better., i always thought the light tack was better and rip it off while still wet, but maybe it is better to use the heavy tack and take it off later. guess it will continue to be a trial and error... I just dont think it should be such a big problem to make some nice details on the piece with a little tape. Im still going through the process of making heaps of mistakes.. but it gets really annoying when its at this stage.. So close, .. two more paint colour, a bit of epoxy, some varnish and twist the tail eye up... then its ready for action. :) ------------- here fishy, fishy fishy..... |
Posted By: smizz
Date Posted: 19 Dec 2010 at 6:19pm
|
just finished painting these just need a clear over them. happy for a first go    ------------- When shooting a mime, don't use a silencer or his friends will hear you. If camera lenses are round why do the pictures come out rectangle? |
Posted By: Bungel_
Date Posted: 25 Dec 2010 at 2:01pm
|
those look pretty dang good smizz. nice effort.
------------- here fishy, fishy fishy..... |
Posted By: fish i
Date Posted: 27 Dec 2010 at 8:20am
Posted this elsewhere but this thread looks good. Your guys lures just keep getting better and better. Good to see the sharing learning community alive and working. Big ups! Was able to disappear into the man cave for a good stint before Christmas. Have put alot of what you cats have shared into action. Stoked with the outcome and action, had some extensive field testing yesterday and they definetly do the business.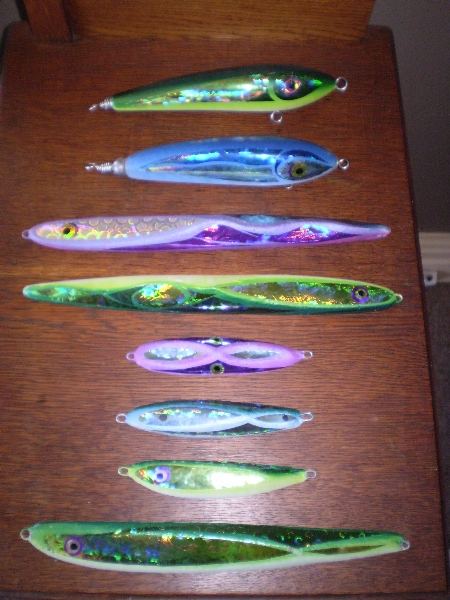 ------------- 6th place in the inaugural Te Kauwhata Regionals paddle crab division |
Posted By: ReelAppealLures
Date Posted: 28 Dec 2010 at 1:34pm
| Wow everyone is really taking it up a notch, lures and jigs are looking awesome. Nice work Murph!! Hey Bungel go and buy painters masking tape ( low tack ) and rub it down hard the 3m stuff is good. |
Posted By: ReelAppealLures
Date Posted: 16 Jan 2011 at 5:09pm
Just a couple of poppers I sent off this morning...Both are 95g and 130mm long. Need to work on my photography skills to get the true colours to show...
 ------------- http://www.facebook.com/pages/Reel-Appeal-Lures/300309486704362 |
Posted By: ReelAppealLures
Date Posted: 18 Jan 2011 at 6:35pm
Fresh off the drying rack, Pink hungry Popper - 230mm and 5oz with 5/0 trebles fitted...
   Cheers. ------------- http://www.facebook.com/pages/Reel-Appeal-Lures/300309486704362 |
Posted By: Murph
Date Posted: 19 Jan 2011 at 8:33am
Outstanding!
|
Posted By: treedoc
Date Posted: 25 Jan 2011 at 9:49am
|
Hey fish i those jigs look awsome mate. What are you using for a mold? I have been experimenting with bog (ok on smaller jigs but melts/catches fire/cracks on larger models) and various mixes of plaster of paris/cement. Jigs are fine but am looking for a more durable mold for the sake of economics.
I am not cloning, looks like yours are original as well!
Your finishing looks mean, some time spent on those by the looks.
Cheers, Muz
|
Posted By: fish i
Date Posted: 30 Jan 2011 at 4:12pm
|
First up, that finishing on those poppers are insane RAL, keep on keeping on with the top quality work mate, unreal. Treedoc - I don't melt lead. I just use a mix of self leveling epoxy resin, iron sand and chipped lead to form a good slurry to pour into my moulds = all free or lying around my shed as excess. My moulds are made with casting plaster = cheap as chips. I shape up an original out of closed cell foam/ surfboard blank, then glass it. Make my mould around that. Mucked around with pouring holes etc. but found was a hassle. I just make a closed mould, get the right consistency with my mix and add just enough to close it up. Takes a bit to get just right but once your on to it, you are on to it. ------------- 6th place in the inaugural Te Kauwhata Regionals paddle crab division |
Posted By: Quick silver
Date Posted: 08 Mar 2011 at 10:16pm
|
Where do you get the nose and belly grommets from? cheers |
Posted By: Murph
Date Posted: 08 Mar 2011 at 10:48pm
| http://www.saltybugger.com/ - http://www.saltybugger.com/ |
Posted By: THEFISHOE
Date Posted: 13 Mar 2011 at 6:33pm
|
im off to buy a lathe after reading this thread
|
Posted By: Bungel_
Date Posted: 26 Mar 2011 at 12:26am
Here is a few i have finally been able to get some paint on. Still need
to get fit the grommets, stick some eyes on and give it a good coat of
varnish. But im happy with the paint job.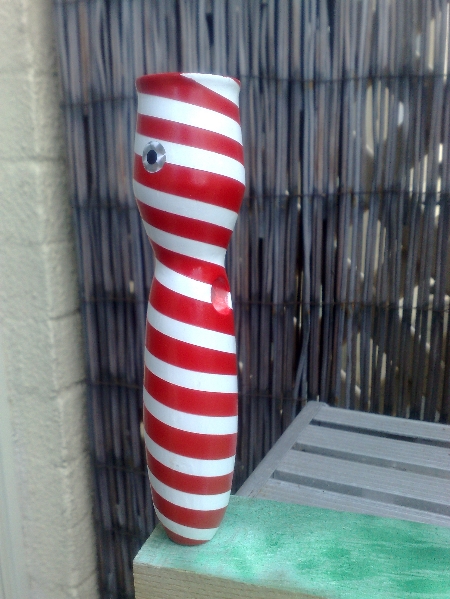 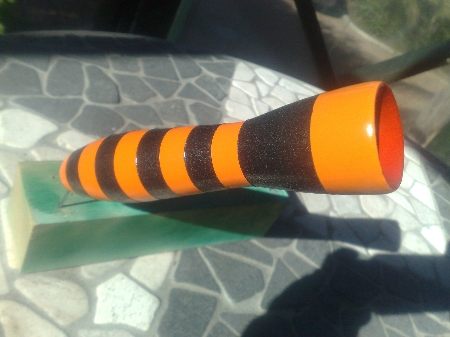 ------------- here fishy, fishy fishy..... |
Posted By: skidoggg
Date Posted: 26 Mar 2011 at 10:00am
| whiiiirrr errrr errrr errrrrrr aayyyy geeze bungel that candy cane popper makin me feel dizzzzzzzzzzzzy !haha *****h it ! |
Posted By: ReelAppealLures
Date Posted: 26 Mar 2011 at 5:00pm
|
Sweet bungel, Nice poppers, have you taken them for a splash yet? What size and weight are they? ------------- http://www.facebook.com/pages/Reel-Appeal-Lures/300309486704362 |
Posted By: ReelAppealLures
Date Posted: 26 Mar 2011 at 5:02pm
One of my latest poppers...200mm and 85-90g Mahimahi paint...   ------------- http://www.facebook.com/pages/Reel-Appeal-Lures/300309486704362 |
Posted By: ReelAppealLures
Date Posted: 26 Mar 2011 at 5:04pm
And more stickbaits for testing really want to get these tuned in and then offer some for sale...200mm and 100g Kahawai and Pilchard.  ------------- http://www.facebook.com/pages/Reel-Appeal-Lures/300309486704362 |
Posted By: Bungel_
Date Posted: 27 Mar 2011 at 12:04am
|
Havnt tested yet... They both have about half an ounce of lead to be added to the tail when the wire is fitted. It will take the weights to 120grams for the white oak lure, and 100grams for the pine lure. They should cast nicely, just hope there is some decent action on the retrieve. Its great fun going through the learning of how to make these, and i can see how it could get quite sophisticated with weights and angles. :) Just wish i had more time to spend making them. ------------- here fishy, fishy fishy..... |
Posted By: Quick silver
Date Posted: 04 Apr 2011 at 6:47pm
|
they look awsome. great work as usual anyone know where/if there is somewhere to get createx paint in the manawatu? |
Posted By: Joker
Date Posted: 04 Apr 2011 at 11:18pm
|
Hi been making lures for years and lose heaps so it needs to be quick to replace though mine are not as polished as RL's lures
here is some tips that I use
Round profile router bits with the bearing taken off into a drill make a superb concave face as the stub fits into the hole through the lure.
A straight edge router bit makes the eye holes to recess doll eyes from the $2 dollar shop for 100
Brass eyelets for canvass work make good grommets as do pop rivets with the nail taken out
permanent black marker pens make good mackerel side lines
Heavy duty 1mm copper wire works well and is more malleable than ss - from 7 strand power feed.
Form the end loop around a big nail and put a swivel into the end loop before wrapping around itself
its ok to use big single live bait hooks - just open the eye with side cutters, put over tail swivel and close with pliers - i sometimes use back to back singles.
If you use split rings - solder them shut - no need to buy expensive heavy duty spllit rings - make sure you buy flux otherwise it wont stick - if your not losing them - you're not using them.
Black and decker made a drill powered compact wood lathe a few years back - keep an eye on TM for one of these.
Old metal files or wood chisels, sharpened make acceptable wood turning tools
Cloth Emery strips (25mm) in a roll for engineering use make for great sanding and is long lasting and durable
water based polyurethane varnish gives an acceptable finish
Glitter sprinkeled over varinsh gives colour without paint - ... $2 dollar shop again
Glitter glue can be painted direct to the lure ... $2 dollar shops again
Water based poster paint from $2 dollar shops for a 200ml pot can be watered down to spray and some good colour ranges
Nail varnish comes in some awesome colours - again $2 doller shops for big bottles at $2
Check out the temporary stick on tattoos for awesome templates that dont need spraying - again the $2 dollar shops
|
Posted By: ReelAppealLures
Date Posted: 04 Apr 2011 at 11:24pm
Solid advice there Joker... ------------- http://www.facebook.com/pages/Reel-Appeal-Lures/300309486704362 |
Posted By: Quick silver
Date Posted: 07 Apr 2011 at 1:40pm
|
Hey RAL if you dont mind sharing. How did you get the texture on the kahawai and pilly? |
Posted By: ReelAppealLures
Date Posted: 07 Apr 2011 at 11:19pm
They are my finger prints  No it is just a simple knurling finish. XXXXXXXXXXX is pretty much the pattern. ------------- http://www.facebook.com/pages/Reel-Appeal-Lures/300309486704362 |
Posted By: ReelAppealLures
Date Posted: 07 Apr 2011 at 11:21pm
A art supply store somewhere in Auckland has it but... They don't answer emails so overseas is your best bet. ------------- http://www.facebook.com/pages/Reel-Appeal-Lures/300309486704362 |
Posted By: ChrisW
Date Posted: 08 Apr 2011 at 12:36pm
|
I have quite a few sheets of 3D moulded stick-on eyes available. Sizes 8mm, 12mm, 15mm in Silver/black pupil, Gold/Black pupil, Red/black pupil. The sheets have approx 110pc, 75c, 60pc of eyes on them. The adhesive is pretty weak and some of the eyes are sliding off some of the sheets. This won't be a problem because you need to resin over top of the eyes anyway. The above quantities are approximate because of this. Price is $10 per sheet. email me at mailto:[email protected] - [email protected] if interested. These are the same eyes that JTF has been using.
Good and cheap. ------------- give it death! |
Posted By: Quick silver
Date Posted: 09 Apr 2011 at 12:08pm
any pics? |
Posted By: ChrisW
Date Posted: 11 Apr 2011 at 8:18pm
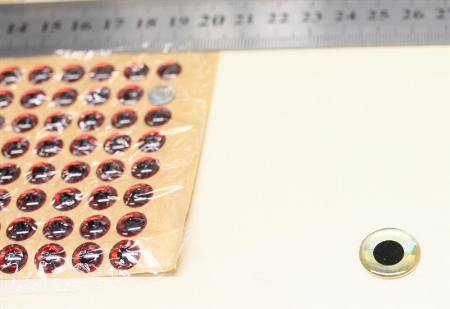
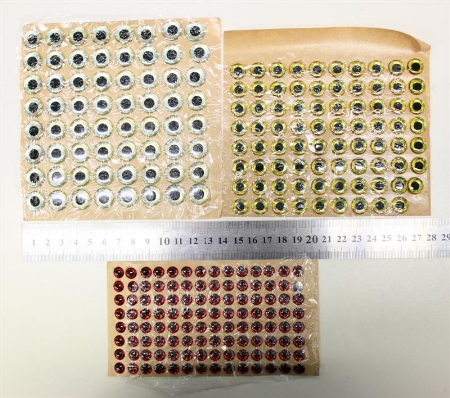 sorry, i can't sell part sheets because cutting the sheets will loosen off some of the eyes. There is bugger-all adhesive on th eyes but most of the eyes are still stuck on and also held there by the cling wrap.
Available in Gold/black, Silver/black, Red/black in 8, 12, 15mm. I also have small 3mm teardrop eyes for SWF or flasher rig flies too. ------------- give it death! |
Posted By: treedoc
Date Posted: 17 Jun 2011 at 8:11pm
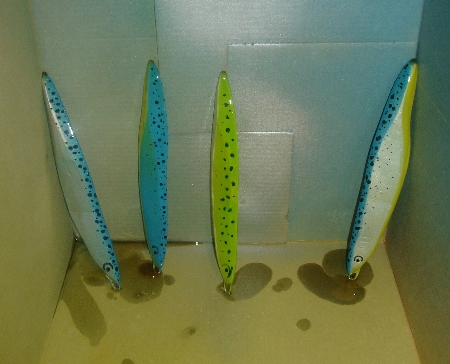 Some inspiration from RAL
|
Posted By: ReelAppealLures
Date Posted: 17 Jun 2011 at 8:55pm
Wicked TD!!! Simple yet super effective  Did you pour those as well? ------------- http://www.facebook.com/pages/Reel-Appeal-Lures/300309486704362 |
Posted By: treedoc
Date Posted: 17 Jun 2011 at 9:46pm
| Yeah I poured em as well. Keep it simple with spraycans, couple of dots with a vivid on this occasion, and dip em in polyurethane. Sometimes I use lumo paint, the green one has a lumo belly |
Posted By: SALTIST 30HA
Date Posted: 17 Jun 2011 at 10:54pm
|
So confused on the painting process can some please do a list from the bear turned wood to ready to go in the water. Also what sort of price am I looking at for a mini lathe with tools and self centering chuck ------------- sweating like a lesbian in a fish shop. |
Posted By: Joker
Date Posted: 28 Jun 2011 at 1:35pm
| Hi Saltist, Check out the Black & decker drill powered mini lathes - sometimes advertised on TM. They are perfect for turning lures. |
Posted By: Quick silver
Date Posted: 03 Jul 2011 at 6:20pm
Thought id have a go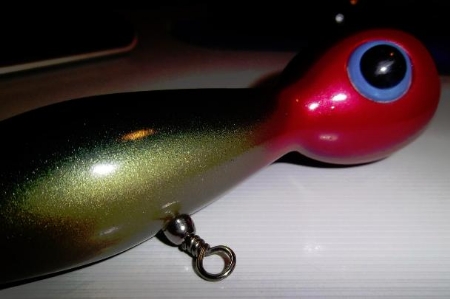 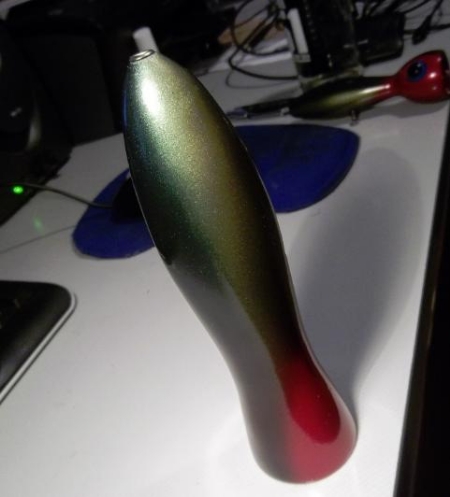 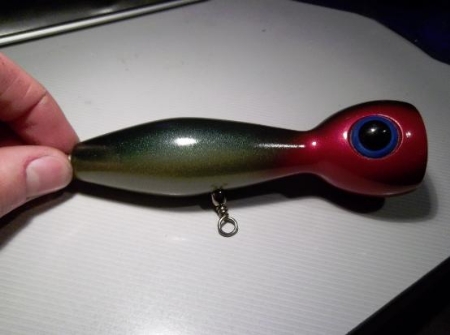 |
Posted By: Capt Asparagus
Date Posted: 03 Jul 2011 at 7:46pm
| Very nice Quicksilver! Perhaps though you could use a crane swivel as opposed to a barrel swivel, it will make the bottom loop closer to the body and less prone to (I think) twisting. |
Posted By: Quick silver
Date Posted: 04 Jul 2011 at 6:58pm
|
Yea i was a bit worried about that to. Is a crane swivel the one with the sleave |
Posted By: Capt Asparagus
Date Posted: 04 Jul 2011 at 8:34pm
| Yes, I think that is how you'd describe it. Very strong swivels for sure. |