Deck replacement in fibreglass Seanymph
Printed From: The Fishing Website
Category: General Forums
Forum Name: The Boat Shed
Forum Description: Discuss all things boating.
URL: https://www.fishing.net.nz/forum/forum_posts.asp?TID=138903
Printed Date: 04 Jun 2026 at 7:56pm
Topic: Deck replacement in fibreglass Seanymph
Posted By: D_C
Subject: Deck replacement in fibreglass Seanymph
Date Posted: 26 Nov 2024 at 7:30pm
|
Hi I've recently cut out half the deck on my 70s era Seanymph due to it being spongy and on the verge of a foot going through. Once I got it out it seems the problem has stemmed from a drain hole into the transom well being glassed over in a previous repair. This left water that drained in the cabin bung trapped under the deck and rotting it from the inside out. It looks to have either had some cross braces added notched into the stringers. Either not done well from factory or again an earlier repair. As such one stringer has some cracks. I was planning on strengthening these with strips of sealed marine ply splinting it as such. and then glassed over. Having some issues getting photos in to better show the situation if someone can school me how to make the image upload tool work that'd be great. But in the meantime the deck plan is to use 12mm BS1088 marine ply. I've done some reading about polyester vs epoxy resin. Seems like epoxy is the best way to go but more expensive. Here's my rough plan but i'd really appreciate tips from pro's, ex pro's or anyone thats done this successfully before. I've done a little bit of fibreglass before but nothing on this scale. +Grind back all the fibreglass thats not even adhering to the stringers in places +Cover in fibreglass and epoxy to seal again +Made a template from paper of the starboard side of the deck. +Transfer to paper and cut oversize for test fit. I might get a sheet of thin mdf to make a dummy run and save some hassle of expensive ply mistakes. Hopefully it mirrors close enough to do the port side. +Once the part fits coat it in epoxy to seal. Should i thin this with acetone a % to help it soak? some say yes other post i saw said this can cause it to not seal as well +Single layer of fibreglass and more resin all over. What do i use here? chopped mat? rovings? sheet ? +Previously the ply was just nailed to the stringers then glassed over to tie in to the hull on the outside and the centre fuel tank stringer. Was planning on mixing up some resin with cabosil to make a peanut butter and using this to "glue" the sheet to the stringers and hull. +Weight the deck down while the expoy hardens +Few more layers of glass over the deck and tabbing up the hull 50mm or so to tie it all in. How many layers should i do? im thinking at least 3-4? +Sand down any really high spots and try it make it even as possible +Cover it with either a gel coat, flow coat or i reas about a non slip deck paint called KiwiGrip. Whats the best epoxy to get Where do i get it from How much will i need. The deck surface area is about 3m2 ish. what type of fibreglass do i get Where from I'll try to figure out pic up loading but its very similar to this older thread i found which has been good reading. Mine has a 120L in floor tank which has stringers up each side then one other between that and the outside edge of the boat. Thanks in advance. I hope forums arent dead https://www.fishing.net.nz/forum/sea-nymph-gullwing-floor-stringer-replacement_topic124415_page4.html |
Replies:
Posted By: Pcj
Date Posted: 26 Nov 2024 at 7:37pm
|
If you have facebook.There are a number ex sea nymph builders there who can give you advice. https://www.facebook.com/groups/143550889316502%20" rel="nofollow - https://www.facebook.com/groups/143550889316502
------------- "Times up" |
Posted By: D_C
Date Posted: 26 Nov 2024 at 7:43pm
|
The deck cut out. i've ground back the outside edge of the hull flat, scared to go too far. i'll sand it all back up high enough when i tab the new glass in over the deck it bonds correctly. 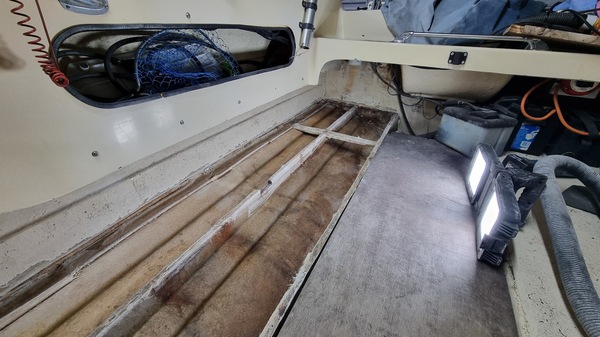
Cracked stringer where the support was on top of. i've cut back some of the glass that wasnt stuck anymore. Assuming water got in behind and just detached it. i'll sand all these back to good glass then epoxy seal. was then planning to splint it as mentioned about with sealed ply maybe 300-500mm long? 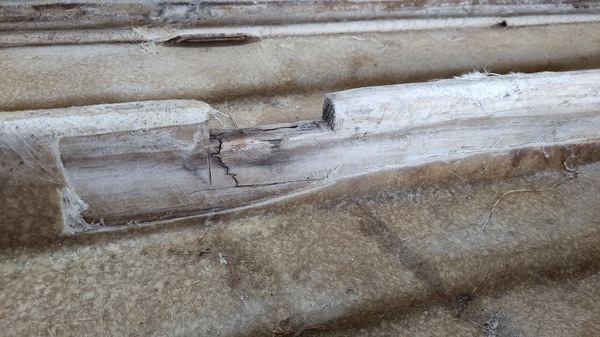 This is one of the support braces. Doesnt seem factory as it as just nailed from the tank side and then into the stringer. it has glass over it but was barely hanging on. i was thinking fixing more splint style parts to the stringer under where the brace goes so it acutally can rest on something firm. Not sure about the outside edge of the hull it seems to just rest there 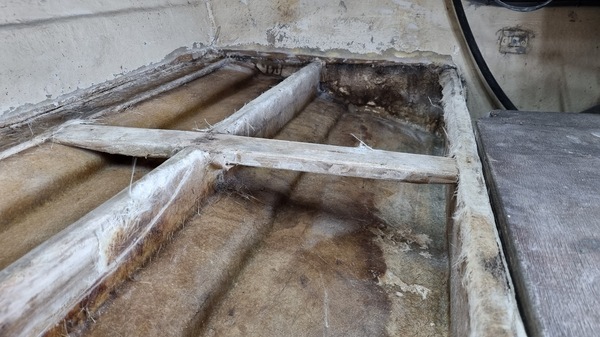 This is the outside edge. i cant work out that fold of glass. its soft and can be pushed down. its not part of the actual hull but doesnt look like it would give the deck anything to sit on. I can only assume that the 2 stringers take the weight and its just wedged to the outside. this is where i was going to "glue" it with epoxy paste to bind it to the outside edge. 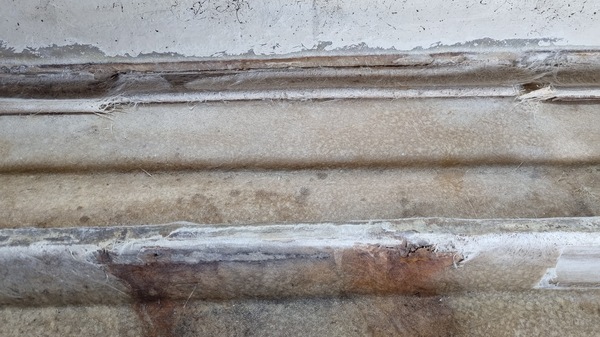 Front of the deck. there's normally cabin wall that goes in here under the console and has pockets on the inside etc. i removed it so i could do the whole deck. same plan to bond it to the seat frame with epoxy then glass it in. 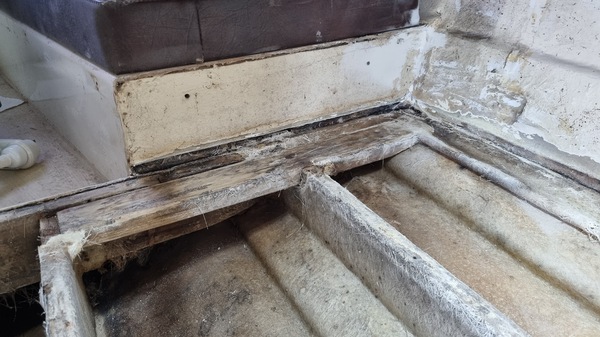 examples of glass thats not even attached to anything 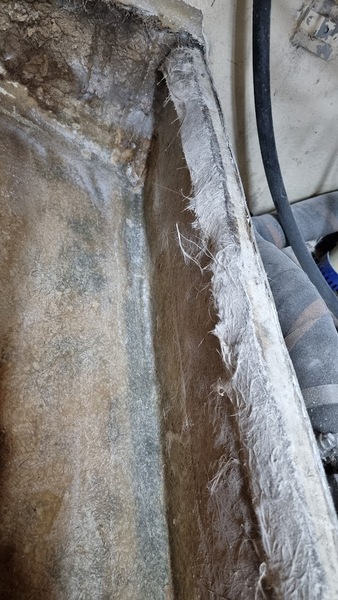 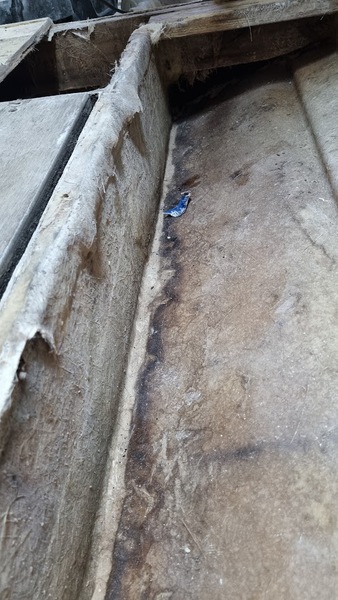 |